Eco-Friendly Beeswax Wraps
Updated April 2026 - Still one of our favorite zero-waste kitchen swaps at Tiffany the Tiny Home. Beeswax wraps are practical, they look great, and they fit perfectly into a tiny kitchen setup.
TL;DR: Sam shows you how to make your own eco-friendly beeswax wraps at home with a few cheap supplies. These reusable wraps are perfect for tiny house living, where reducing waste and saving space go hand in hand. Full DIY instructions below.
Hello friend!
This past holiday season, things were a little different for us. We asked for no gifts, as we don't have space for new belongings. Our families compromised by getting us some really awesome experiences! We also wanted to share our new lifestyle with our families. This led to an idea on our end. I decided to make stocking stuffers for everyone.
I had seen these beeswax wraps before and always loved the idea. Less plastic, natural materials, smaller carbon footprint. It's a win-win!
Want to experience tiny living in Sarasota? Book a stay at Tiffany the Tiny Home or Shellmate Island at sunshinestaterental.com

So, what are they? These beeswax wraps can be used as a replacement for plastic cling wrap or Ziploc bags. Unfinished produce bowls without lids, even sandwiches! Warm the wraps with your hands to slightly melt the beeswax and they hold whatever shape you need. These are available for purchase, but the DIY version can save you some money and you get to pick your favorite prints! And now for the how-to!
This post contains affiliate links. Please read the disclaimer for more information.
Materials:
Cotton fabric in your favorite print (organic if available)
Pine rosin (optional, but great for the cling factor)
Essential oils (optional, food-grade)
Almond or jojoba oil
Tinfoil or parchment paper
Heat source

Step 1: Cut your fabric to the desired size. I used pinking shears to ensure the ends wouldn't fray.

Step 2: Mix your beeswax! I used about 1/4 cup of pellets, 1/2 tsp pine rosin, 1/2 tbsp almond oil, and 3 drops of lavender essential oil for antibacterial purposes. Mix well.

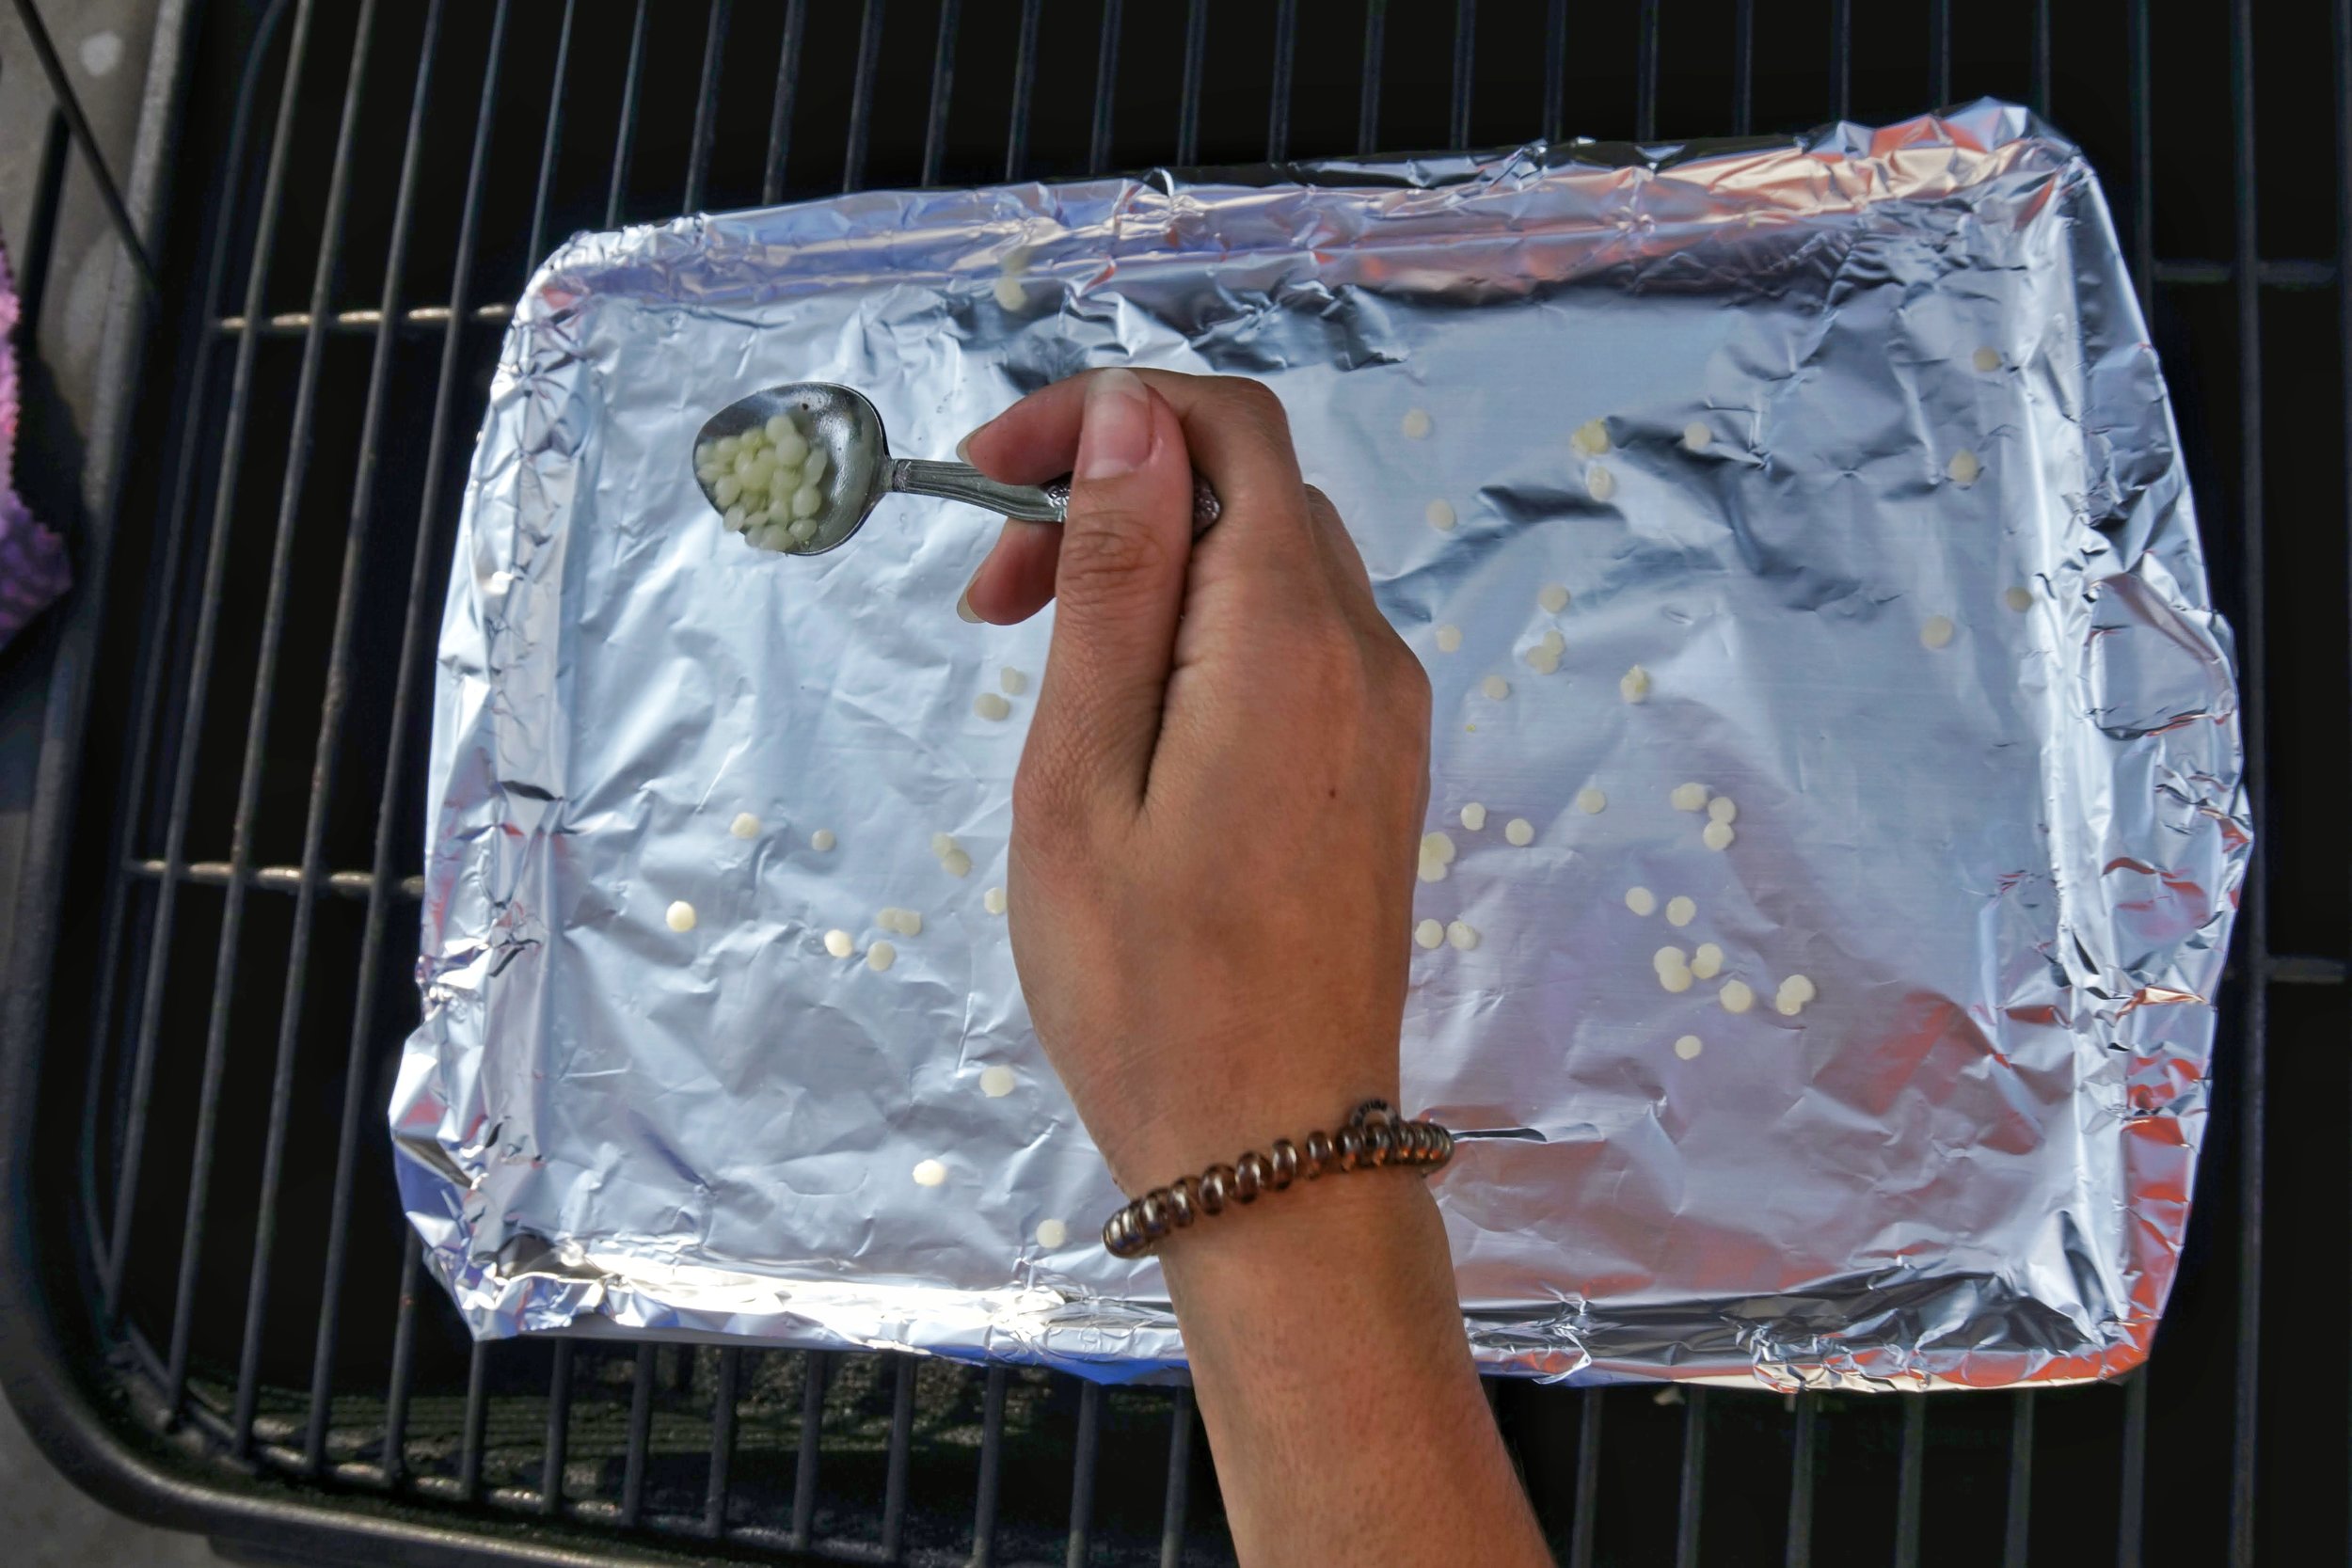

Step 3: Sprinkle lightly over the fabric. Be sure to distribute this mixture evenly and spread a tiny bit underneath the fabric so the wrap is dual-sided. You may not use the entire mixture.
Step 4: Heat your fabric on very low heat, the beeswax will melt quickly! I used our grill outside :)
Step 5: Use the paintbrush to distribute evenly and saturate the fabric. Be sure to get the corners and edges, or your wraps won't hold shape.
Step 6: Hang to dry! I hung hemp twine and used clothespins, but you could use anything, even the back of a chair. These dry within minutes and are ready to use!


Overall, these wraps are awesome. I use them daily. Since I pack my lunch every day, they are huge space savers in my Isobag lunch box (no Tupperware necessary) and are eco-friendly! The pine rosin is completely optional, but I would recommend it as it gives the wraps extra grip. This helps the airtight factor and ensures a solid wrap. Foods tested and approved so far include sandwiches, avocados (no browning!), half an onion (no smell on the wraps), and lots of bowls without lids.
Care is simple. Just hand wash in cold water with mild soap, and air dry. Avoid using raw meats. These wraps should last 4-6 months with regular use! I'm loving mine so far!
Any eco-friendly crafts you've tried and loved? Planning to try this one out? Comment below!
-Sam